Billing and Invoicing is a value-add feature that allows you create and send out invoices from within Converge to be paid through the Converge hosted payment page.
In order to set up a billing and invoicing you need to have ecommerce added to your account, if you do not already have an ecommerce terminal id assigned. Please reach out to our support team for assistance with this.
We will need to ensure you have access to the terminal and the appropriate user rights.
Once ecommerce is enabled on your account and billing and invoicing has been added to your account:
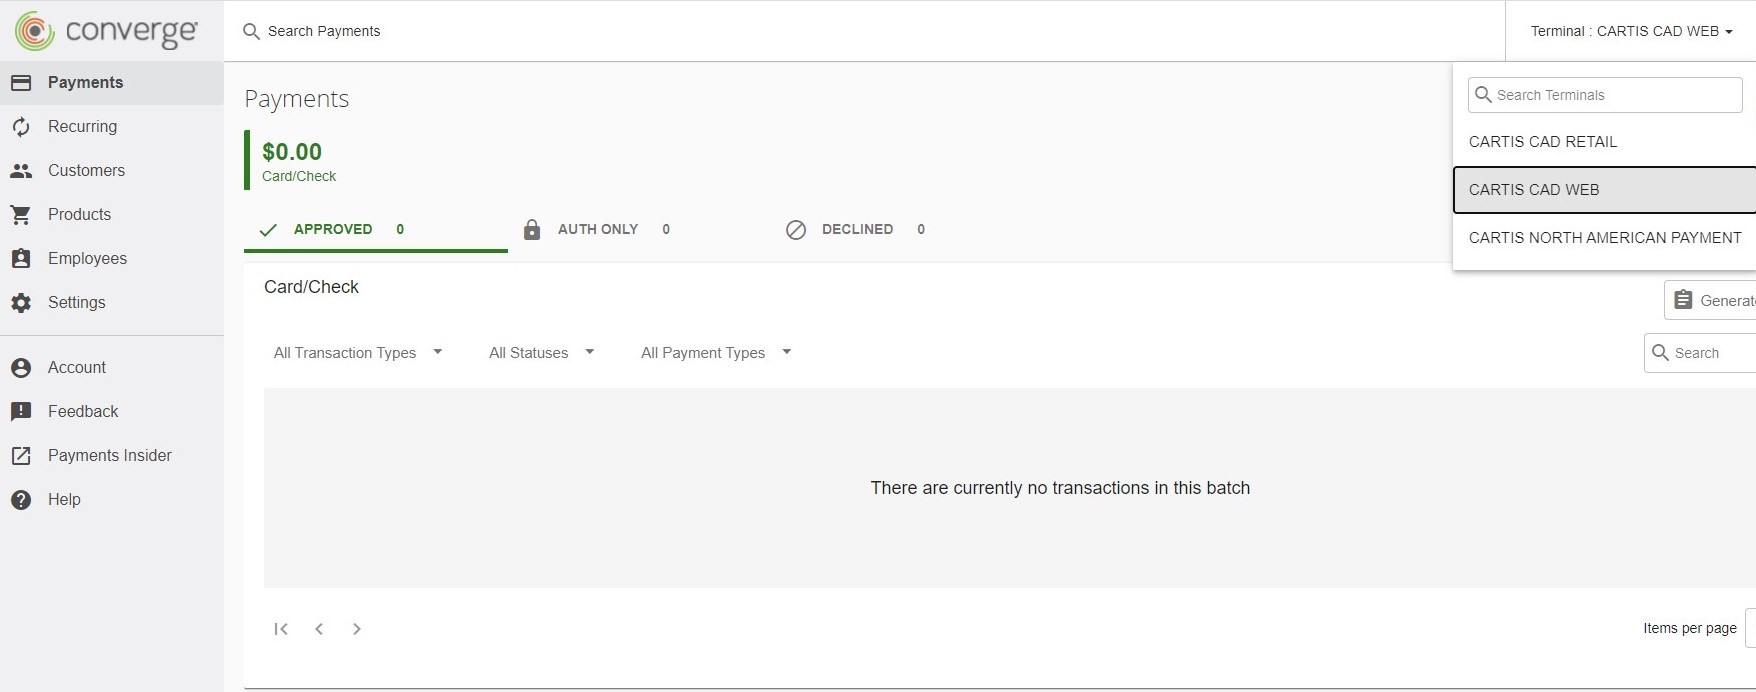
Step 1 - Ensure you are working on the right terminal ID.
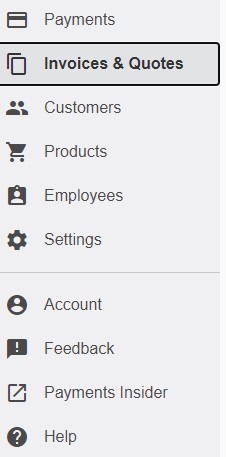
If you have multiple terminal ID’s- Using the dropdown terminal menu on the top right - select your Internet terminal. You should then see the Invoices & Quotes item appear in the left side menu.
Step 2 - Enable billing and invoicing
Select Settings from the left side menu and under Enabled Value Services, select Invoices & Quotes
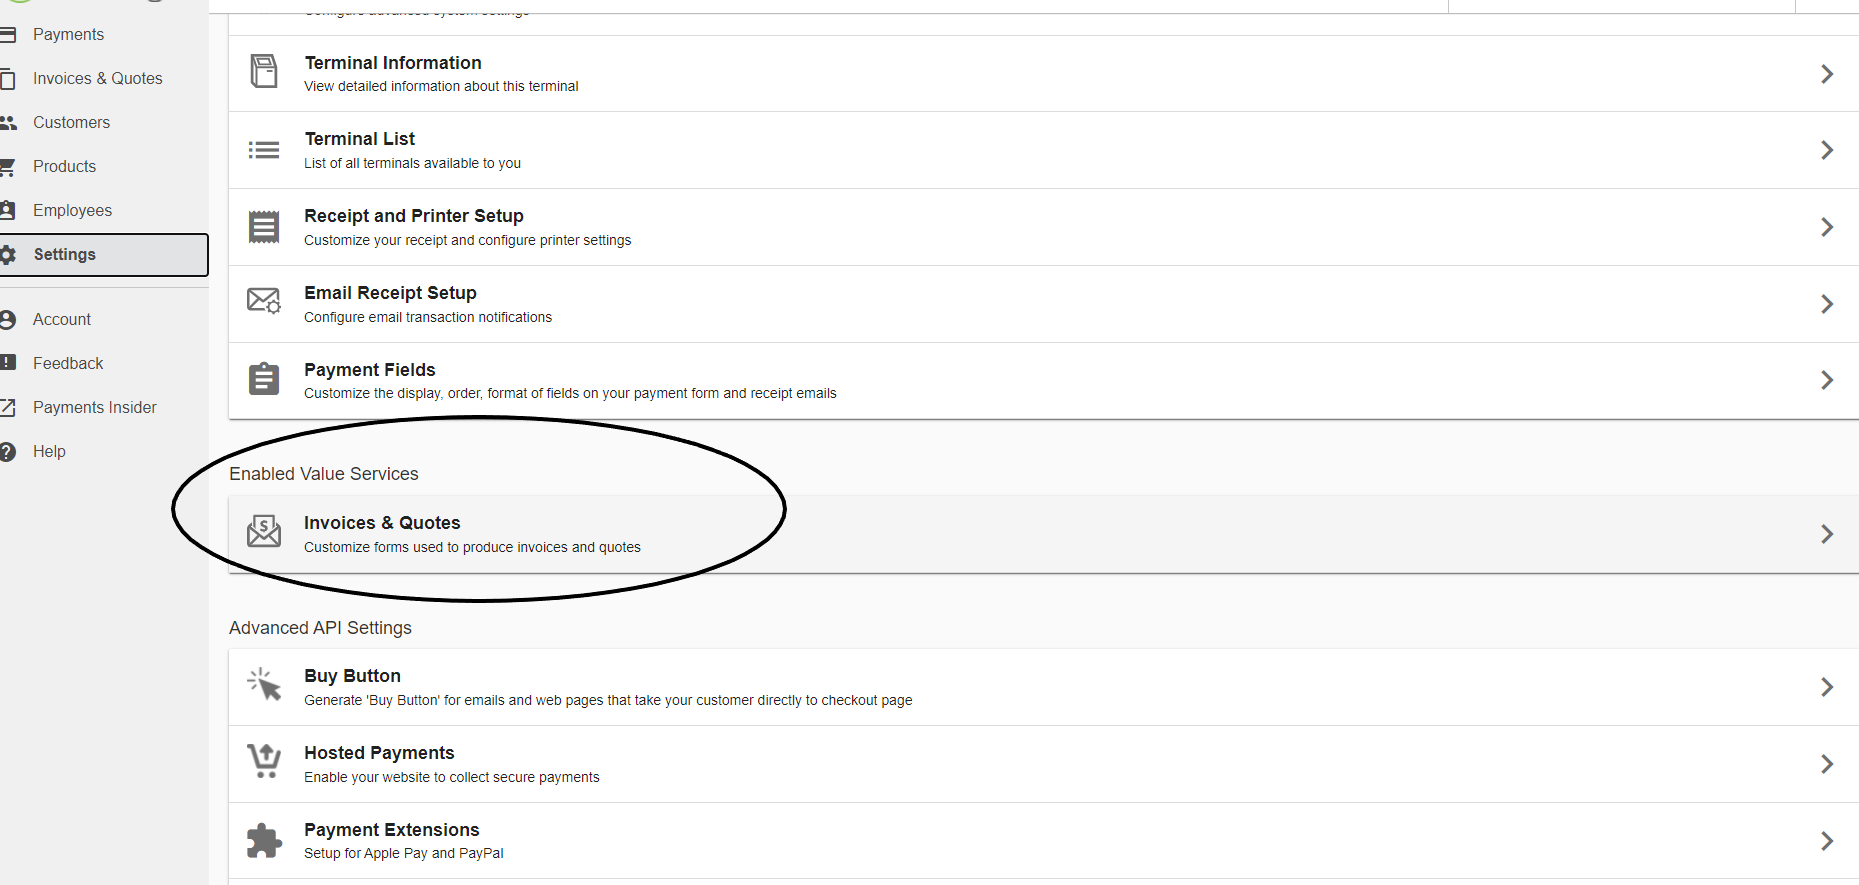
Click on Enable Billing and Invoicing
The information that was provided during the application process will be pre-filled
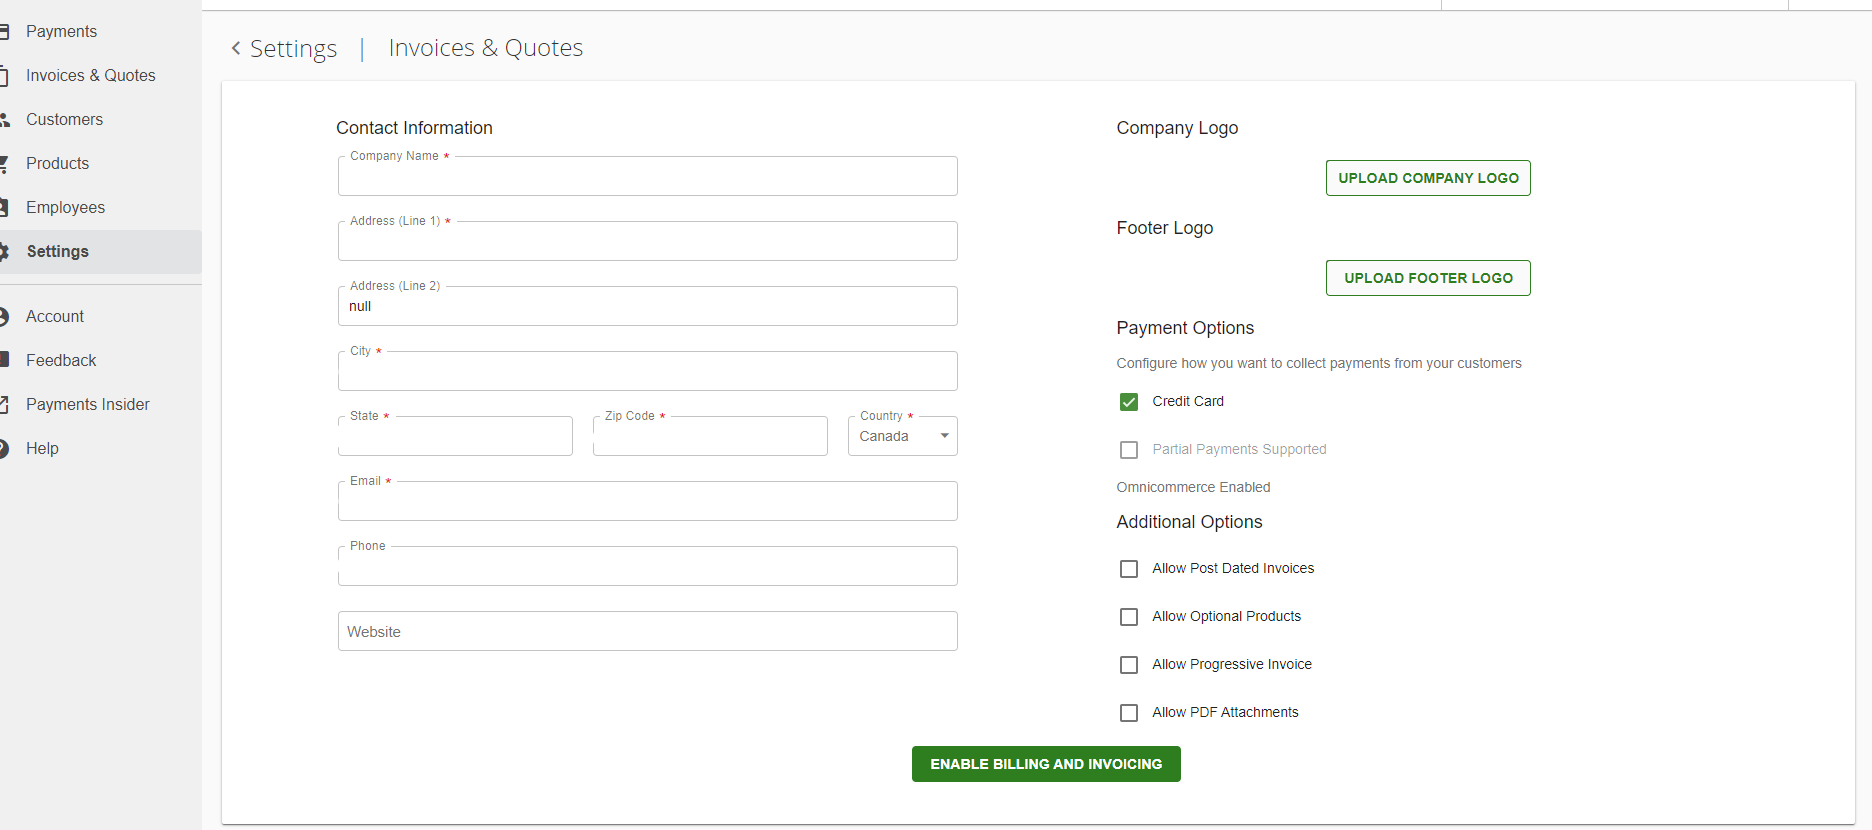
Enter a return policy (and any field that prompts as required) then press save.
These can all be customized after setup.
If you log in and select the Invoices & Quotes menu item and receive an Error getting merchant data or Not Authorized error, it means the above steps have not yet been completed.
Step 3 - Customizing the Invoice and Invoice / Reminder Emails
Go to settings from the left side menu and select Invoices and Quotes (as in step 2 above)
From here you will be able to customize your information (Merchant info), setup the invoice and configure invoice / reminder emails.
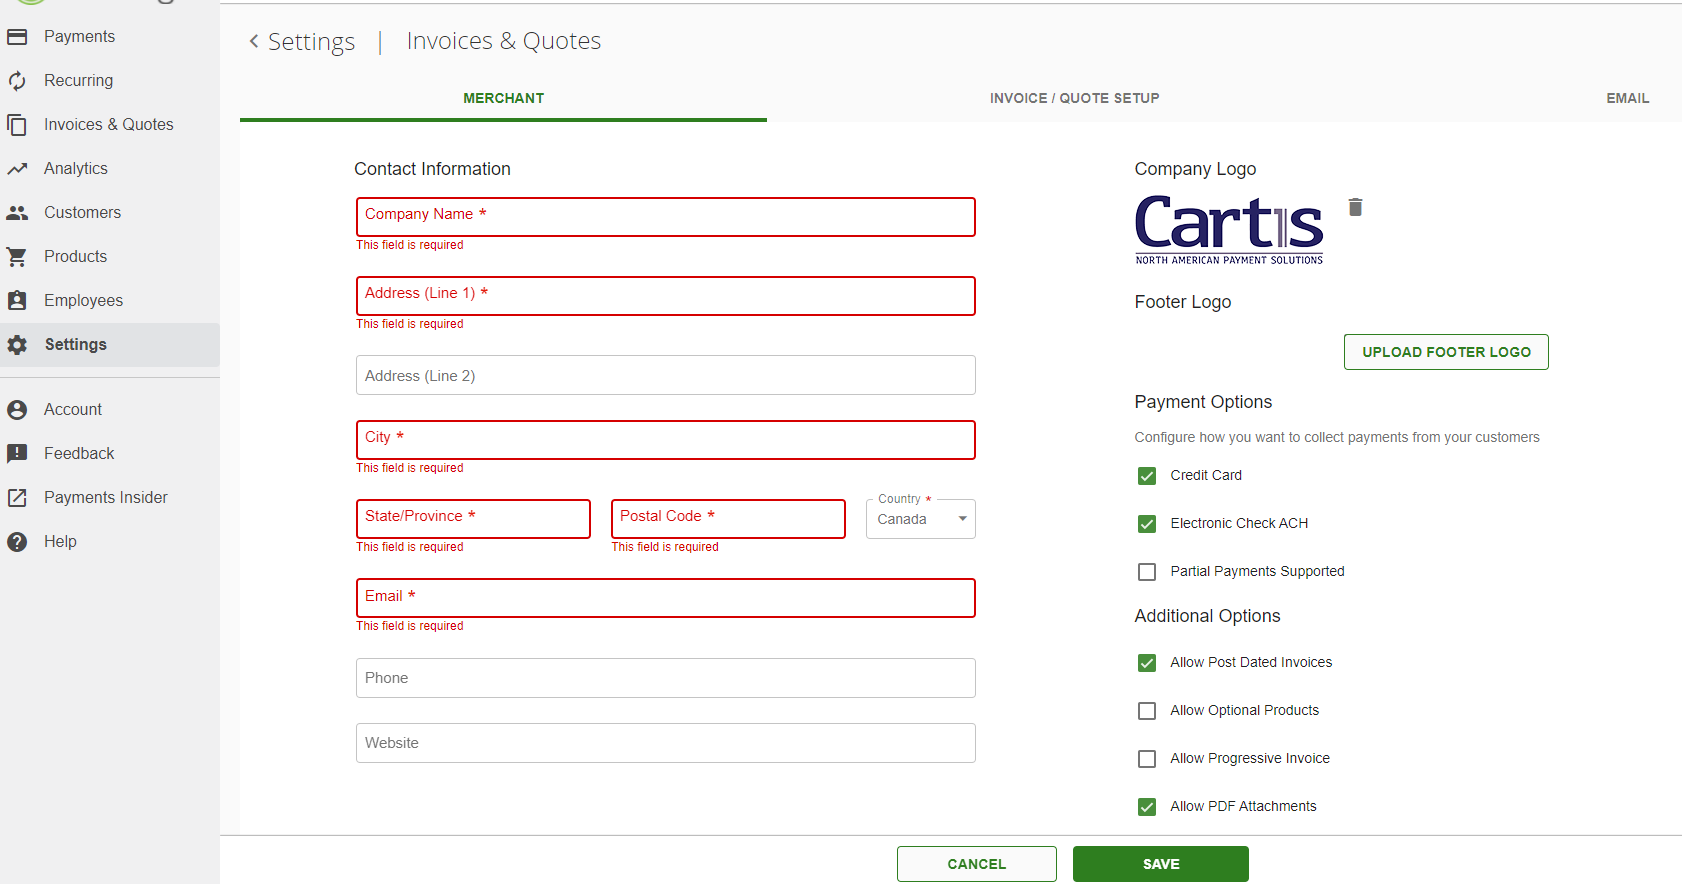
Merchant Tab
The information will be pre-filled with the information we have for your merchant account.
You can upload a company logo and/or a footer logo.
Select the payment types (depending on what is enabled on your account) you want to accept through the invoice.
Select additional options you want to setup for your invoice
When done, press save.
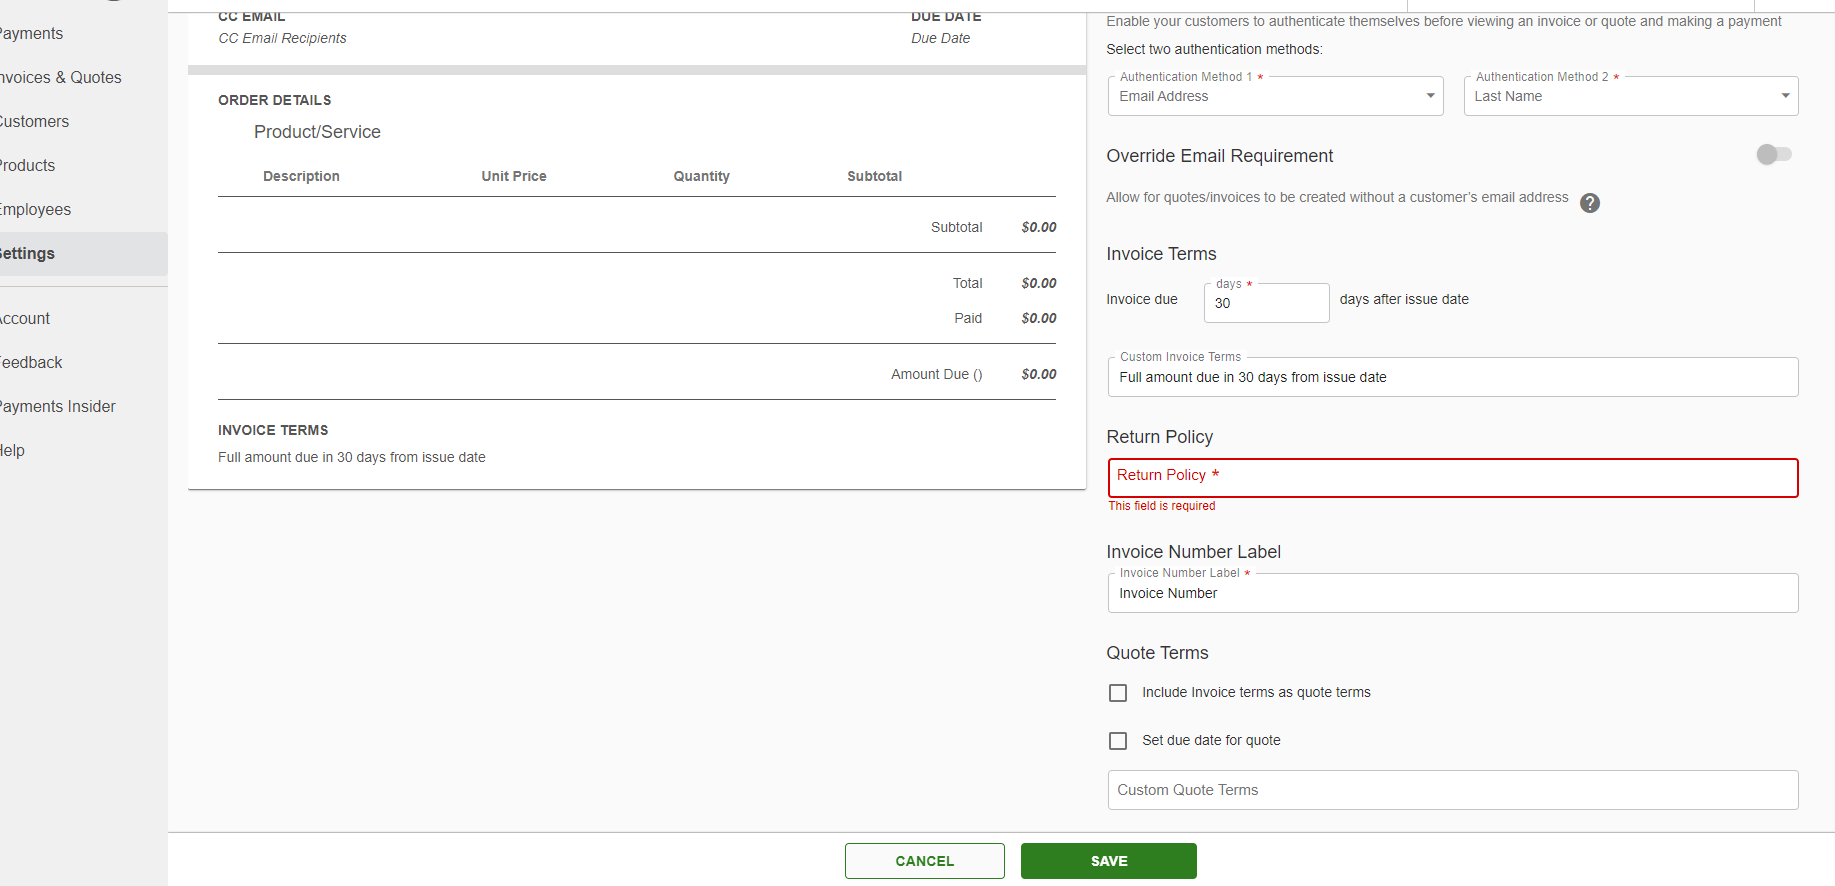
Invoice / Quote Setup Tab
From here you will be able to configure your invoice / quote layout and theme.
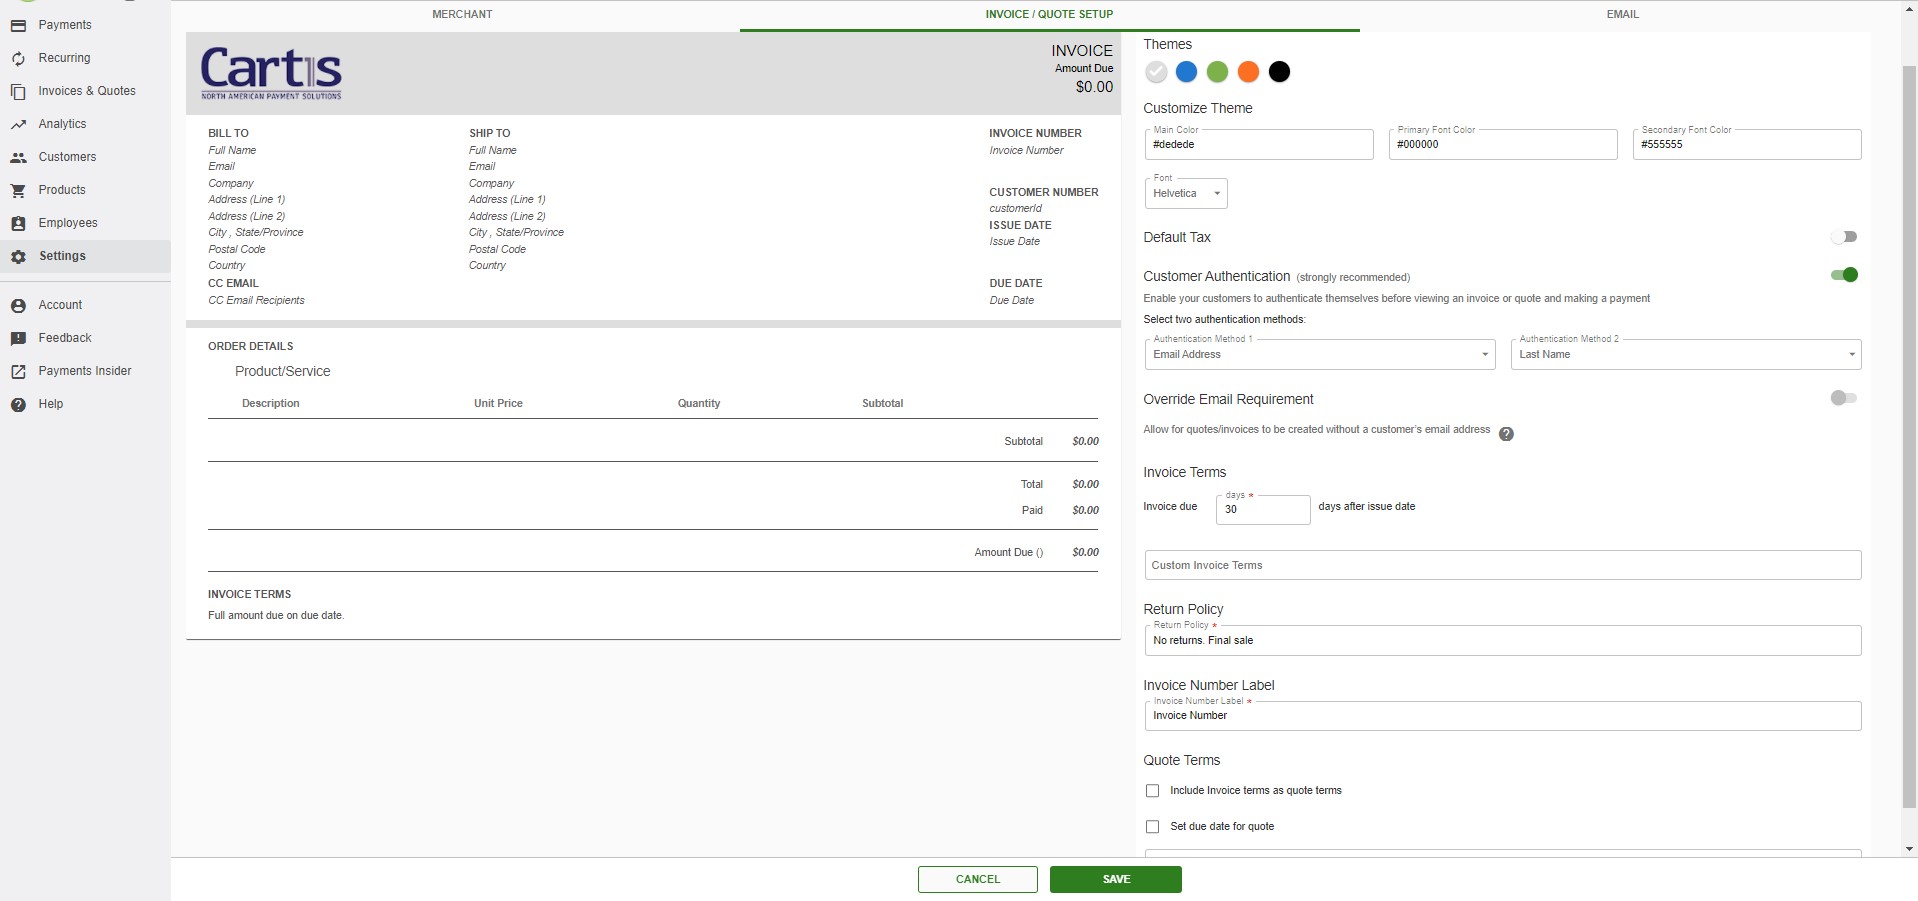
You can select your font and choose an available color or enter your own color values.
You can enable or disable the tax field and if enable select if it is a flat amount or a percentage.
You can enable or disable customer authentication, and if enabled choose the authentication method. We strongly encourage enabling this option as this allows the customer to authenticate themselves before viewing the invoice and making a payment.
Set the default invoice due date
Outline any custom invoice terms to display on invoice
Outline your return policy to display on invoice
Choose to set the invoice terms as your quote terms or outline custom quote terms.
When done, press save.
Email Tab
When sending out an invoice, an email is generated with the invoice information. From here you can customize the available email templates for: Invoice email, quote email, reminder email, late reminder email, quote cancelled email and invoice cancelled email
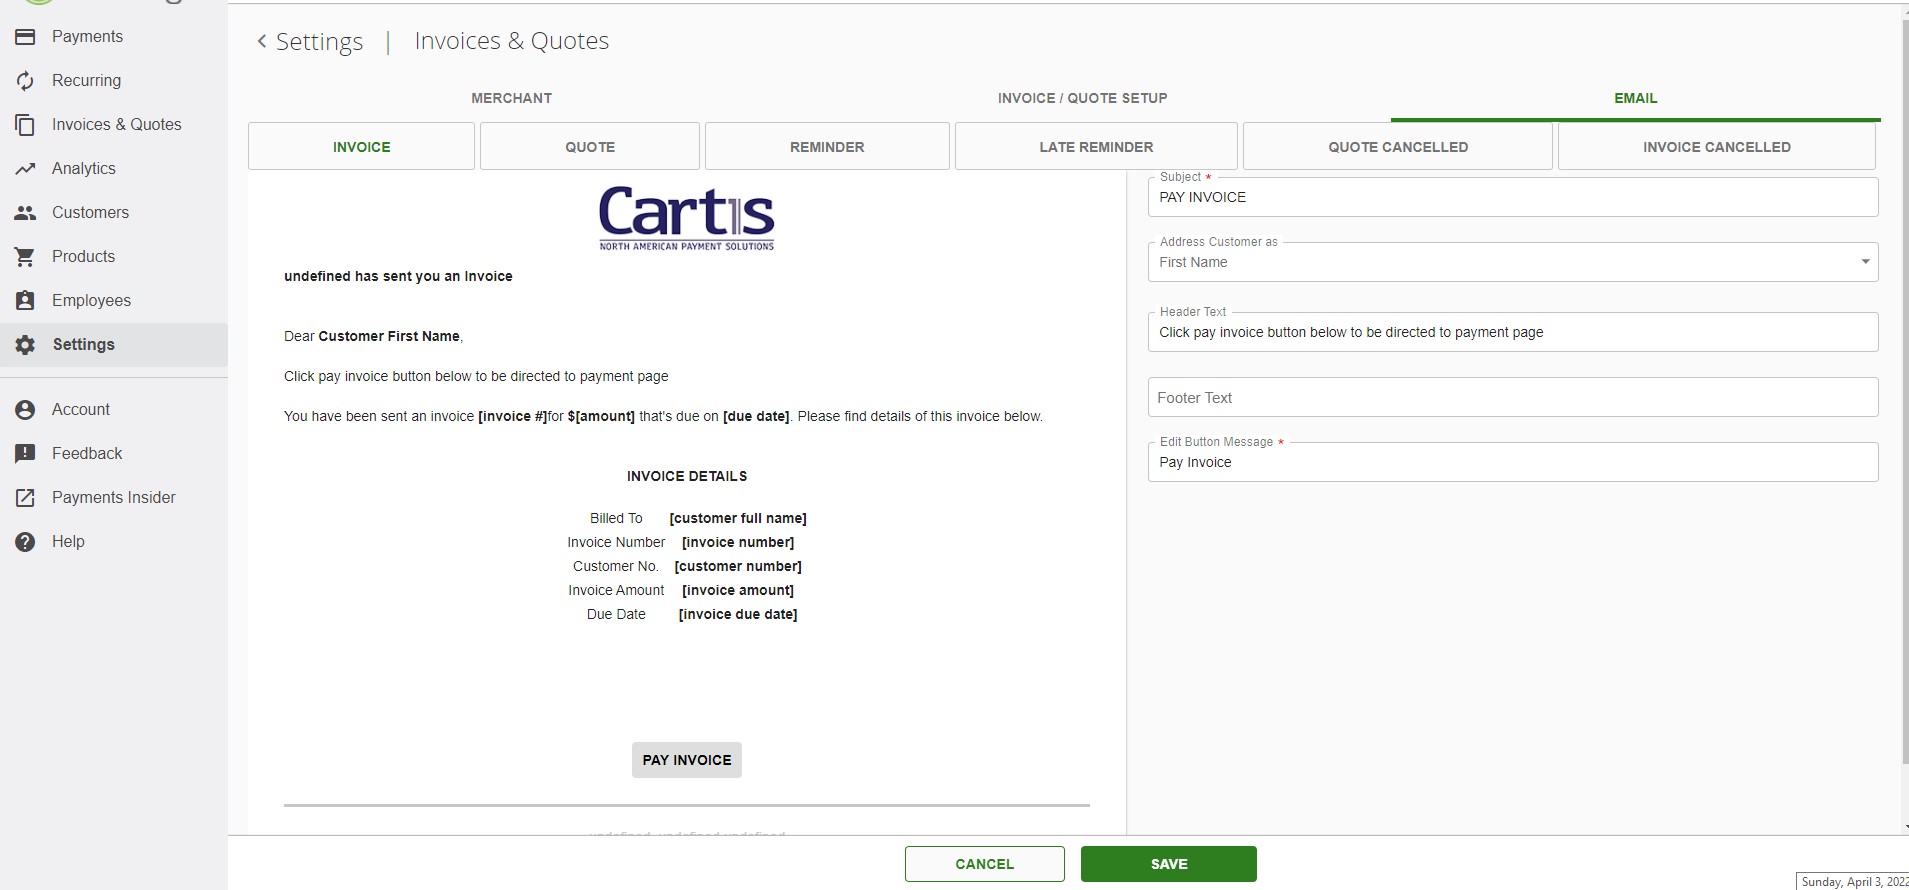
You can fill in the subject of the email
Select how to address your customer
Add header and footer text
Select what the payment button text says.
From the reminder tab you can enable an automatic email reminder to be sent 1 - 14 days prior to due date. You can also enable automatic email to be sent with late reminder for late invoices.
Step 4 - Creating and sending Invoice / Quote
Now that your invoice and emails are configured you are ready to create an invoice / quote
From the left side menu select Invoices & Quotes
Choose the invoice or quote tab depending on what you are creating
Choose to create a new invoice / quote or import invoices and quotes.
You will be taken to the new invoice page
If you have a product catalog and are sending an invoice for one of those products you can search for that product or create new product to add to the invoice / quote.
You will want to give a product description, product code, unit price and quantity.
If you have tokenization enabled on your account, you can search existing customers from your card vault or manually enter the customer information. 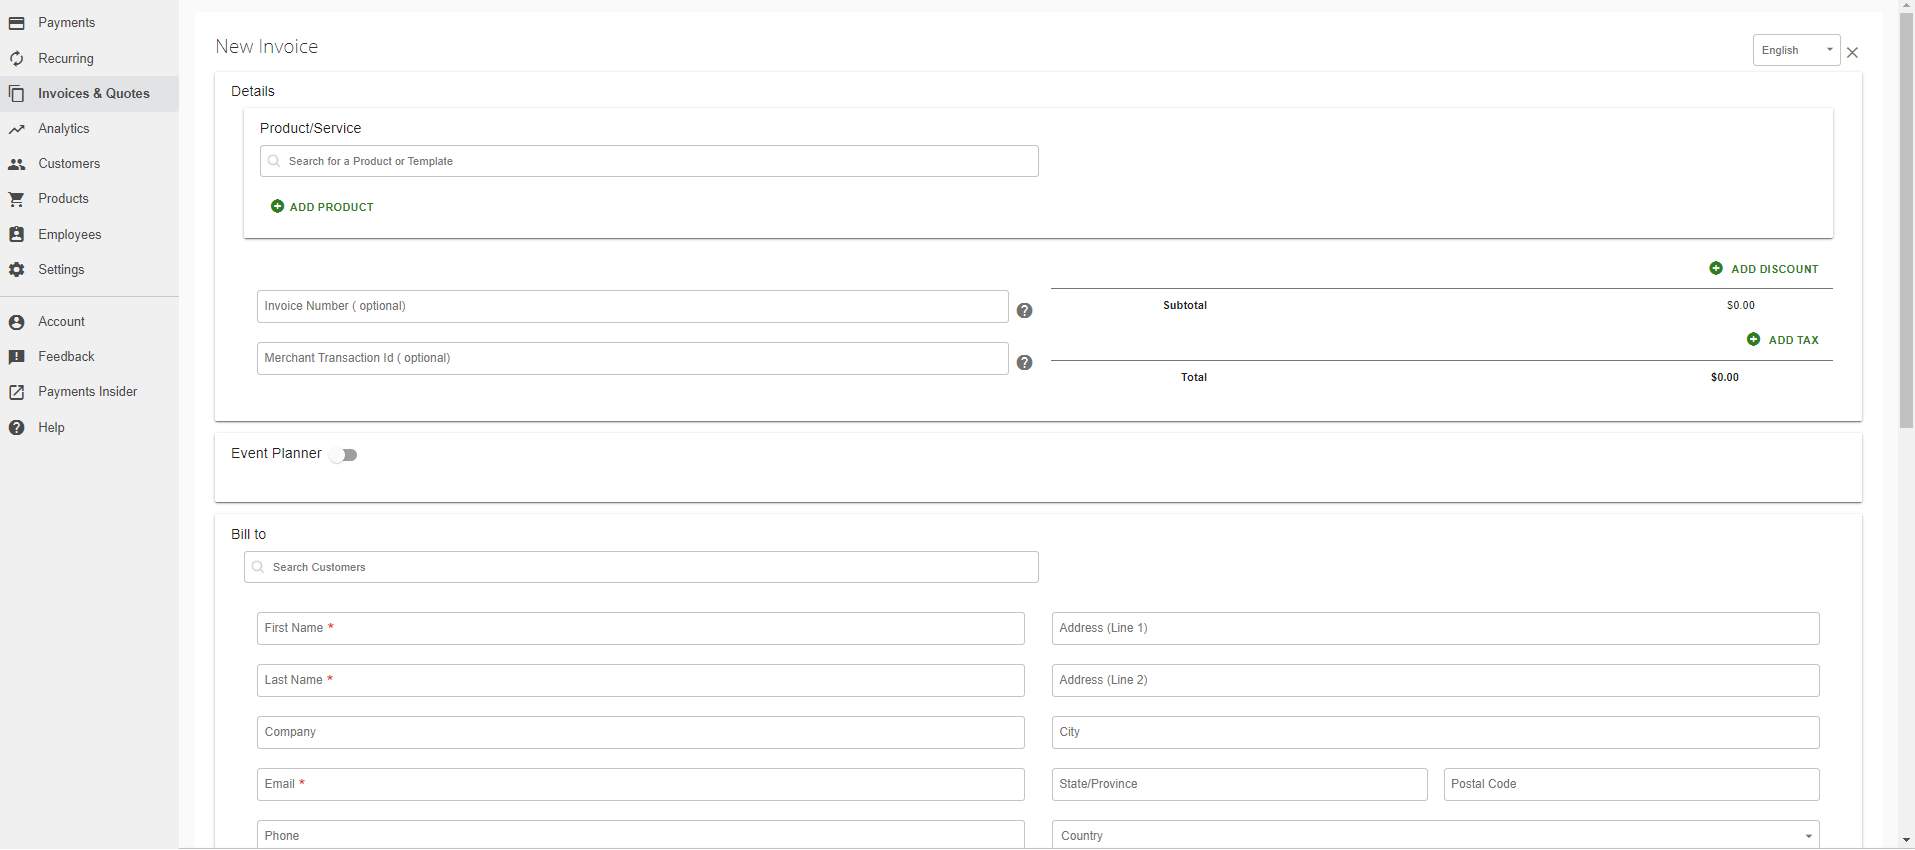
In the additional options and custom fields section you can choose the payment types (depending on what is available on your account), schedule the invoice / quote date, and set a due date.
You can also include up to 3 CC email addresses and up to 3 custom fields as well as include an attachment.
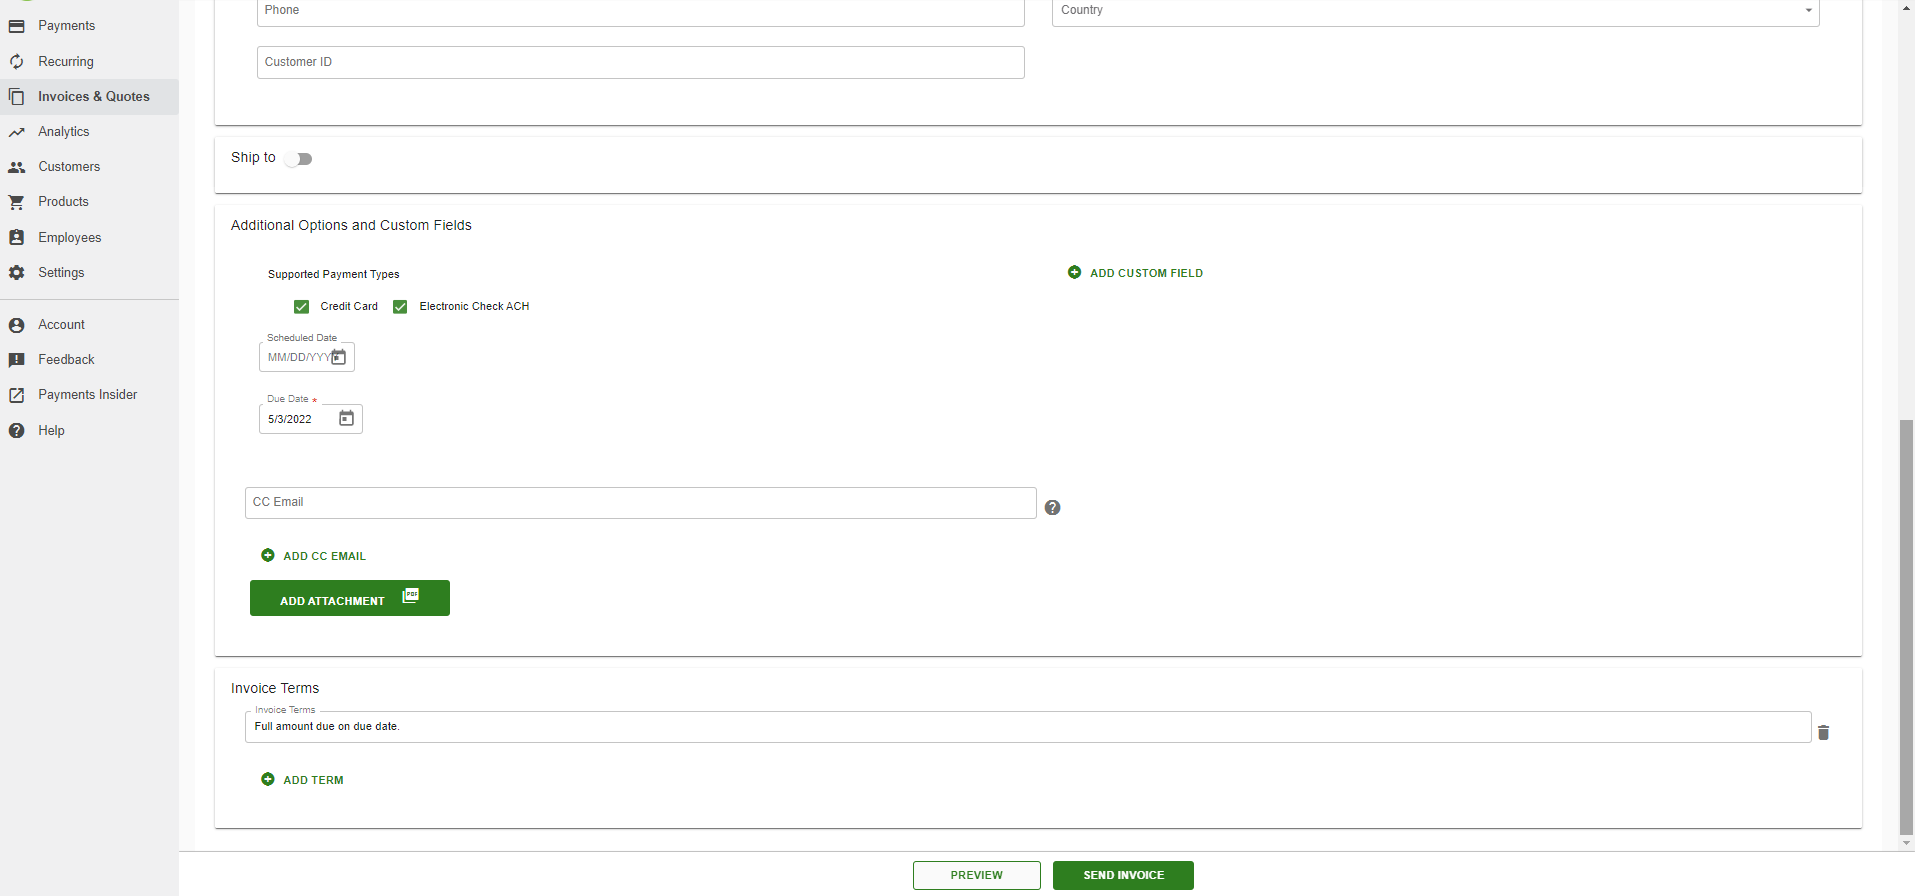
You can amend the default invoice / quote terms and add an additional term.
Once done, you will want to preview the invoice / quote and if it is correct click send invoice.
An email will automatically be generated to your customer with the template you set and a pdf attachment of your invoice / quote.